728x90
반응형


**scale.xml**
<?xml version="1.0" encoding="utf-8"?>
<set xmlns:android="http://schemas.android.com/apk/res/android">
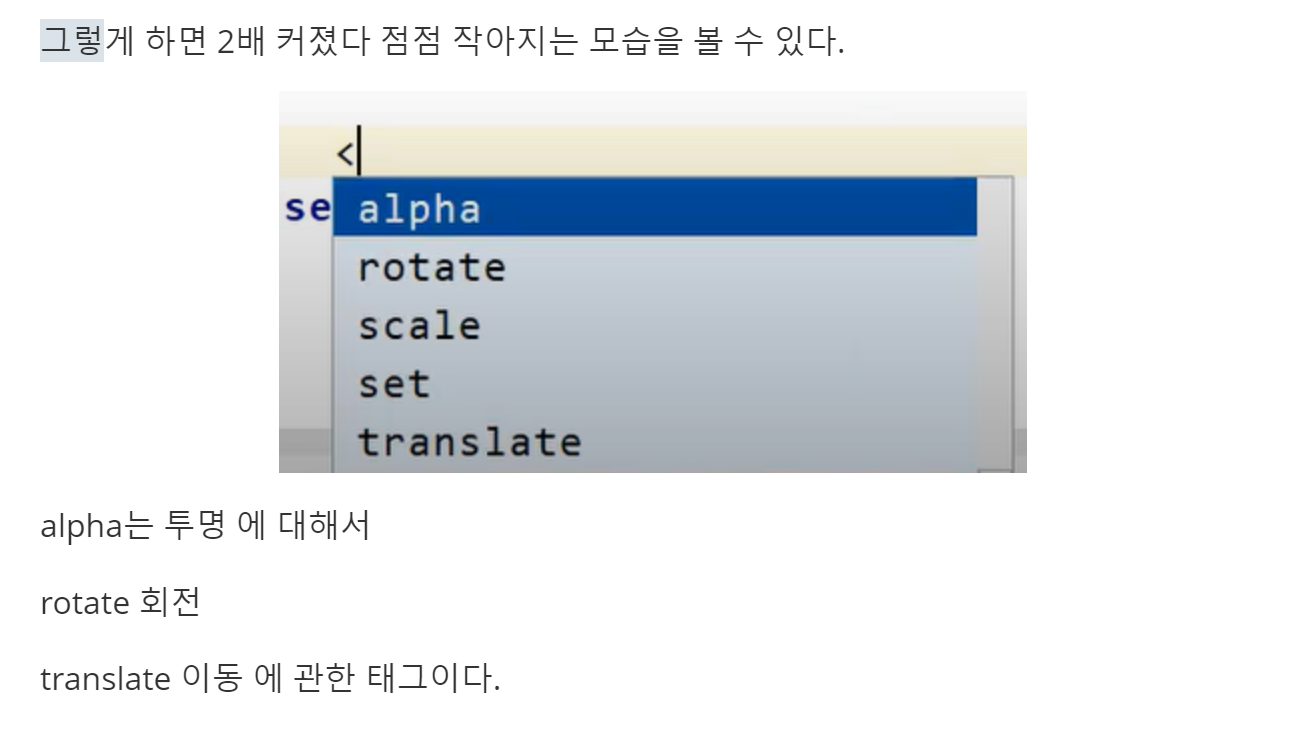
    <!--확대 축소를 위한 태그
    duration 2.5초 지속
    pivotX 는 가로방향의 중심축이 어디인지
    fromXScale="1.0" 1.0은 원래 내 크기에서 시작
    toXScale="2.0" 2배로 키우겠다 하는것
    -->
    <scale
        android:duration="2500"
        android:pivotX="50%"
        android:pivotY="50%"
        android:fromXScale="1.0"
        android:fromYScale="1.0"
        android:toXScale="2.0"
        android:toYScale="2.0"
        />
</set>
안드로이드 애니메이션은 뷰에 적용할 수 있고, drawable 객체에 적용할 수 있다.
일단 뷰에 적용하자 일단 버튼을 하나 생성해준다.
**activity_main.xml**
<?xml version="1.0" encoding="utf-8"?>
<LinearLayout xmlns:android="http://schemas.android.com/apk/res/android"
    xmlns:app="http://schemas.android.com/apk/res-auto"
    xmlns:tools="http://schemas.android.com/tools"
    android:layout_width="match_parent"
    android:layout_height="match_parent"
    android:orientation="vertical"
    tools:context=".MainActivity">

    <Button
        android:id="@+id/button"
        android:layout_width="wrap_content"
        android:layout_height="wrap_content"
        android:layout_gravity="center_horizontal"
        android:text="확대"/>
</LinearLayout>**MainActivity.java**
package com.threedpit.myanim;

import androidx.appcompat.app.AppCompatActivity;

import android.os.Bundle;
import android.view.View;
import android.view.animation.Animation;
import android.view.animation.AnimationUtils;
import android.widget.Button;

public class MainActivity extends AppCompatActivity {

    @Override
    protected void onCreate(Bundle savedInstanceState) {
        super.onCreate(savedInstanceState);
        setContentView(R.layout.activity_main);
        Button button = findViewById(R.id.button);
        button.setOnClickListener(new View.OnClickListener() {
            @Override
            public void onClick(View view) {
                // 우리가 만든 애니메이션을 AnimaionUtils에 LoadAnimaion으로 불러와준다.
               Animation anim = AnimationUtils.loadAnimation(getApplicationContext(),R.anim.scale);
                view.startAnimation(anim);//이렇게 해서 해주면 동작한다.
            }
        });
    }
}
이렇게 구현 해주면 버튼을 클릭했을 때 동작은 아래와 같다.

**자연스럽게 천천히 줄어 들게 하는 방법을 해보자**
**activity_main.xml**
버튼을 하나더 추가 해준다.
<?xml version="1.0" encoding="utf-8"?>
<LinearLayout xmlns:android="http://schemas.android.com/apk/res/android"
    xmlns:app="http://schemas.android.com/apk/res-auto"
    xmlns:tools="http://schemas.android.com/tools"
    android:layout_width="match_parent"
    android:layout_height="match_parent"
    android:orientation="vertical"
    tools:context=".MainActivity">

    <Button
        android:id="@+id/button"
        android:layout_width="wrap_content"
        android:layout_height="wrap_content"
        android:layout_gravity="center_horizontal"
        android:text="확대"/>

    <Button
        android:id="@+id/button2"
        android:layout_width="wrap_content"
        android:layout_height="wrap_content"
        android:layout_gravity="center_horizontal"
        android:text="확대2"/>
</LinearLayout>**MainActivity.java**
그리고 버튼에 우리가 커졌다 작아지는 동작을 넣어준다.
package com.threedpit.myanim;

import androidx.appcompat.app.AppCompatActivity;

import android.os.Bundle;
import android.view.View;
import android.view.animation.Animation;
import android.view.animation.AnimationUtils;
import android.widget.Button;

public class MainActivity extends AppCompatActivity {

    @Override
    protected void onCreate(Bundle savedInstanceState) {
        super.onCreate(savedInstanceState);
        setContentView(R.layout.activity_main);
        Button button = findViewById(R.id.button);
        button.setOnClickListener(new View.OnClickListener() {
            @Override
            public void onClick(View view) {
                // 우리가 만든 애니메이션을 AnimaionUtils에 LoadAnimaion으로 불러와준다.
               Animation anim = AnimationUtils.loadAnimation(getApplicationContext(),R.anim.scale);
                view.startAnimation(anim);//이렇게 해서 해주면 동작한다.
            }
        });

        Button button2 = findViewById(R.id.button2);
        button2.setOnClickListener(new View.OnClickListener() {
            @Override
            public void onClick(View view) {
                // 우리가 만든 애니메이션을 AnimaionUtils에 LoadAnimaion으로 불러와준다.
                Animation anim2 = AnimationUtils.loadAnimation(getApplicationContext(),R.anim.scale2);
                view.startAnimation(anim2);//이렇게 해서 해주면 동작한다.
            }
        });

    }
}

페이지 슬라이딩
일단 화면 구성을
**activity_main.xml**
<?xml version="1.0" encoding="utf-8"?>
<FrameLayout xmlns:android="http://schemas.android.com/apk/res/android"
    xmlns:app="http://schemas.android.com/apk/res-auto"
    xmlns:tools="http://schemas.android.com/tools"
    android:layout_width="match_parent"
    android:layout_height="match_parent"
    tools:context=".MainActivity">

    <LinearLayout
        android:layout_width="match_parent"
        android:layout_height="match_parent"
        android:background="#5555FF"
        android:orientation="vertical" />

    <LinearLayout
        android:id="@+id/page"
        android:layout_width="200dp"
        android:layout_height="match_parent"
        android:layout_gravity="right"
        android:background="#FFFF66"
        android:orientation="vertical"
        android:visibility="gone">

    </LinearLayout>

    <Button
        android:id="@+id/button"
        android:layout_width="wrap_content"
        android:layout_height="wrap_content"
        android:layout_gravity="right|center_vertical"
        android:text="열기" />

</FrameLayout>
이렇게 구성을 해줍니다.
그리고 anim이라는 디렉토리를 res폴더 아래에 하나 만들고
그안에 translate_left.xml이라는 것을 하나 더 만들어주세요.
**translate_left.xml**
<?xml version="1.0" encoding="utf-8"?>
<set xmlns:android="http://schemas.android.com/apk/res/android"
    android:interpolator="@android:anim/accelerate_decelerate_interpolator" >
    <!--interpolator는 우리가 애니메이션이 똑같은 속도로 가는게 아니고 다른 속도로
    움직이게 하기 위해 사용한다. -->

    <!--
    repeatCount는 몇번 반복할껀지
    fillAfter 이것은 애니메이션이 끝나고 마지막 위치고 둘것인지
    -->
    <translate
        android:fromXDelta="100%p"
        android:toXDelta="0%p"
        android:duration="500"
        android:repeatCount="0"
        android:fillAfter="true"
        />
</set>**translate_right.xml**
<?xml version="1.0" encoding="utf-8"?>
<set xmlns:android="http://schemas.android.com/apk/res/android"
    android:interpolator="@android:anim/accelerate_decelerate_interpolator" >
    <!--interpolator는 우리가 애니메이션이 똑같은 속도로 가는게 아니고 다른 속도로
    움직이게 하기 위해 사용한다. -->

    <!--
    repeatCount는 몇번 반복할껀지
    fillAfter 이것은 애니메이션이 끝나고 마지막 위치고 둘것인지
    -->
    <translate
        android:fromXDelta="0%p"
        android:toXDelta="100%p"
        android:duration="500"
        android:repeatCount="0"
        android:fillAfter="true"
        />
</set>
이렇게 두가지 애니메이션을 만들어주세요.
**MainActivity.java**
package com.threedpit.mysliding;

import androidx.appcompat.app.AppCompatActivity;

import android.os.Bundle;
import android.text.Layout;
import android.view.View;
import android.view.animation.Animation;
import android.view.animation.AnimationUtils;
import android.widget.Button;
import android.widget.LinearLayout;

public class MainActivity extends AppCompatActivity {
    Animation translateLeftAnim;
    Animation translateRightAnim;

    LinearLayout page;
    Button button ;

    boolean isPageOpen = false;
    @Override
    protected void onCreate(Bundle savedInstanceState) {
        super.onCreate(savedInstanceState);
        setContentView(R.layout.activity_main);

        page = findViewById(R.id.page);

        translateLeftAnim = AnimationUtils.loadAnimation(this,R.anim.translate_left);
        translateRightAnim = AnimationUtils.loadAnimation(this,R.anim.translate_right);

        //첫번째 애니메이션이 끝날때 버튼이 열기로 그대로 있는데
        //그 글씨를 닫기로 바꾸고 싶다. 그럴때
        //애니메이션이 종료 되었을 때, 애니메이션이 종료된 정보를 받을 수 있다.
        //그것을 리스너로 받아볼 수 있다.
        SlidingAnimaionListener animListener = new SlidingAnimaionListener();
        translateLeftAnim.setAnimationListener(animListener);
        translateRightAnim.setAnimationListener(animListener);

        button=findViewById(R.id.button);
        button.setOnClickListener(new View.OnClickListener() {
            @Override
            public void onClick(View view) {
                if(isPageOpen) {
                    page.startAnimation(translateRightAnim);
                }else {
                    page.setVisibility(View.VISIBLE);// 화면에 보이게 하기
                    page.startAnimation(translateLeftAnim);
                }
            }
        });
    }
    class SlidingAnimaionListener implements Animation.AnimationListener{
        @Override
        public void onAnimationStart(Animation animation) {// 애니메이션 시작하는 시점

        }

        @Override
        public void onAnimationEnd(Animation animation) {//애니메이션 끝나는 시점
            if(isPageOpen){
                page.setVisibility(View.INVISIBLE);// 화면에서 안보이게 하고
                button.setText("열기");// 열기로 버튼을 바꾸고
                isPageOpen = false;//닫힌 상태임을 표시
                 }else{
                button.setText("닫기");//닫기로 버튼을 바꾸고
                isPageOpen = true;//열린 상태임을 표시
            }
        }

        @Override
        public void onAnimationRepeat(Animation animation) {//애니메이션 반복되는 시점점

        }    }
}

728x90
반응형
'안드로이드(Android)' 카테고리의 다른 글
| 안드로이드 이론 빡공 24 (0) | 2020.07.17 |
|---|---|
| 안드로이드 이론 빡공 23 (0) | 2020.07.14 |
| 안드로이드 이론 빡공 21 (0) | 2020.07.06 |
| 안드로이드 이론 빡공 20 (0) | 2020.07.03 |
| 안드로이드 이론 빡공 19 (0) | 2020.07.01 |


댓글